Thursday, December 18, 2008

Office Tannenbaum


This is my 16" office Christmas tree, all decked out with battery operated red lights, little glittery silver snowballs and, just to amp up the Avril Lavigne factor, some skull and crossbones garland (homemade of course). And if my desk doesn't say "festive if not overboard" I don't know what does. I hope y'all enjoy this slice of my daily life here at work. Behind the tree is a corkboard covered in that I choose to call my inspiration board because I tack up little bits and pieces I collect.


A close up. You needed it. You wanted it. You got it.

Wednesday, December 17, 2008

Look Who's Turning One


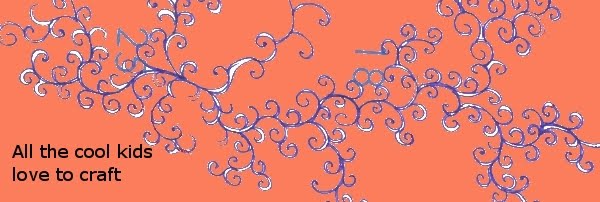
This time one year ago, my baby blog was born. Doodle commemorates the occasion. Celebrate with me. Do something crafty. Fly a kite.

Tuesday, December 16, 2008

Button Upgrade, Once More


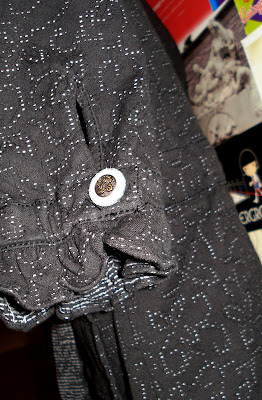
I got this cute little jacket/blazer thing at a ritzy boutique in the West Village for a business trip to California last year. And sadly, the buttons came off the jacket a little too quickly to call the thing high quality. But alas, I'm not here to be a garment inspector or a clothing critic. I'm just here to tell you about this sewing upgrade. Do you think I've been in a sewing mode lately? It's a little ridiculous. I hate pulling out all the supplies so when I made Mr. Gingerbread man, I sewed everything else I could think of so I could put away the machine and the rest of the pins, threads, needles, and assorted other bits and bobs. This is, I believe, the last thing I've got to report on of this nature for a while. Whew! A girl gets tired of these kinds of projects. Sewing is my mommy's game, not mine.
Anyhow, back to this blazer thing... so (or should I be punny and say "sew") I got to delve into the aforshown bowls of buttons to find a good match. I added them to both sleeves and its a big time upgrade.

Monday, December 15, 2008

Cuff Links, the Homemade Version

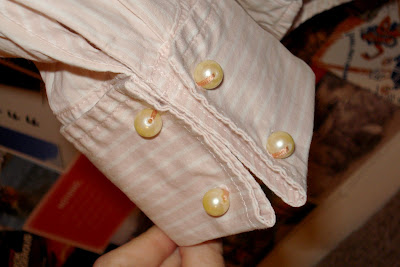
So I got this shirt years ago at a Gap Outlet in Freeport, Maine. And it came with buttons as cuff links. Well, wouldn't you know, immediately one set (four are needed for the shirt, two per cuff) died in the dryer. And then I lost a second set. And well, then the shirt disappeared into the back of the closet or was only used when the sleeves could be rolled up three or four times each to avoid showing off the missing cuff links. I pulled out the bead kit, found 16 identical pearls (let's admit they are knockoffs) and a nice colored embroidery thread to sew them into cuff links. It was pretty easy as a process and I'm prepared to say this is a big upgrade from the original.


Friday, December 12, 2008

Christmas Doodle

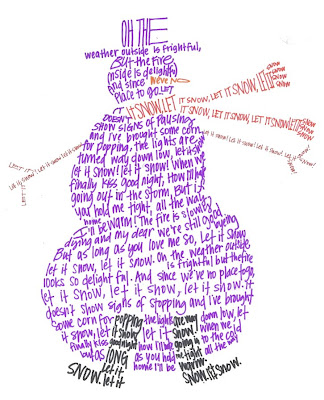
I drew this snowman out of text. I'm digging the idea. I'm not going to claim that I came up with the idea, but I really got a kick out of creating this snow man and plan to mix this concept with some calligraphy skills and do something really spectacular for next year's Christmas card. Too bad I didn't come up with something like this a few months ago or I could have used it for this year. It's not that exciting of a craft, but I wanted to show it to my lovely readers, anyway.

Wednesday, December 10, 2008

Button Switch Upgrade

Look at my WalMart sweater! I've garnered a plethora of compliments now that I've upgraded its buttons. This is a wardrobe upgrade. I took something that looked OK and made it look great. Clearly, I'm proud of this one. I liked this shirt when I saw it at WalMart. It is so versatile. It can be paired with so many outfits, too. I always thought the buttons were a give away that the thing came from a discount store. So, I bought some new buttons and changed the sweater up, quite drastically. I got these green ceramic buttons at the craft store without measuring the size of the originals. And naturally I guessed wrong. The new buttons are significantly larger than the old ones and, therefore, the buttonholes needed to be changed. I hate breaking into knit sweaters and buttonholes can be so tricky, but as the sweater was both cheap and fuzzy, I figured, what's the worst that can happen? Turns out, not much. The ceramic buttons are so much heavier than the old plastic ones that I had to sew a snap into the neck of the sweater so that every part would stay in place. And while I was sewing that in... I decided to give the label an upgrade, too. I take the sweater off frequently, so I thought it would be neat to have an arty little label inside instead of WalMart's No Boundaries. So you can see that in the pics, too.

This is my arty button shot. I don't know why I included it with this post other than because I thought it was just plain awesome. I inherited this massive button collection from my mom when she was trying to pare down her sewing supplies. I carefully separated them into categories, by color, material, size. I love when I get a chance to dive right in and grab some good ones. I'm always scheming of ways to use these buttons. I think you'll see lots of 'em in the next few weeks!

Here's the before shot. The sweater in its cheap button glory. And behind it is the lovely postcard wall that I've been working on for the past year. Thanks to all of those who have contributed.
I included this picture so you could see the size difference between the green ceramic button and the cheap plastic ones.

And finally, I took this picture and liked the way the fuzziness showed up. Hope you enjoy it, too.

Tuesday, December 9, 2008

Blueprints for Mr. Gingerbread

I wanted to share this creative sketch-out that I did before I started on the gingerbread man. I was talking over the project with one of my coworkers and I drew my concept for him (top right) and he inquired about the placement of the man on the tree. Those two faces on the left were his impressions of what a gingerbread man should look like when he gets a Christmas tree enema.

Monday, December 8, 2008

Gingerbread Man of My Dreams

And now for the Theta Christmas tree topper.
First I'll tell you the supplies and then I'll tell you the process... This is an
old school crafting post, one that actually offers advice on making the above
pictured tree topper.
  • brown foam
  • six green and red buttons
  • two packages of white brick-a-brack trim, medium thickness
  • scissors
  • craft glue
  • a hot glue gun with glue sticks
  • brown thread
  • a sewing machine or the will power to sew quite a lot by hand
  • lots and lots of straight pins
  • cheap cotton cloth, appropriately ginger colored
  • several examples of other gingerbread men, to use for inspiration
  • something to use as eyeballs, four of 'em
  • a brown crayon
  • red paint, to use as a mouth.

Take yer brown crayon and your brown foam, draw a gingerbread man. Cut out the gingerbread man from foam. I used two pieces of foam and cut them both out so that I could give, as a coworker called it, the poor final product a Christmas-tree enema. I took a picture to explain what I'm talking about. So next you take your fabric and lay it out on a flat surface folded in half so that it is two pieces of fabric thick and place the gingerbread man cutout on top. Trace around the man, leaving about an inch and a half border. Cut out the fabric so that you have two pieces of gingerbread man looking fabric. Now it's time to put the foam bit on the inside of the fabric pieces and pin all around him. Sew him up, leaving a space between his legs so that you can take out the foam and eventually install him on top of a Christmas tree (thus the enema comment). Turn the sewn product inside out so that the hem is on the inside, replace the foam inside to give him a taut look and feel. Real cookies are never wrinkled. Not to get naughty here, but you'll need to glue the fabric from between his legs to the foam, so that he is complete, all around. Next you'll add the brick brack using craft glue (or hot glue depending on your personal preferences). I left about a quarter inch on the outside of the brick brack, but again, it's up to you. Add your buttons for his tummy and your sparkly eyes and then paint on a mouth. I added a gross grain ribbon sash around his neck to make him extra pretty. My guy was double sided for a tree to be displayed in the round, so I had to do the last several steps twice. Stick a tree up his bum and you're done!

I've uploaded lots of pictures to show off the project (and my somewhat messy process).

So here's the guy all covered in pins. And you get a good idea of the supplies I used to create the man. Note the shoe in the top left of the photo and the trash on the floor. I was so messy the night I made this dude!
So I needed brown thread. I bought some when I bought the fabric only to come home and find almost an identical color thread in my sewing box. Think of all the gingerbread men I could sew with these two spools.
This is my dude when I'd sewn him up. Notice how snug his cover his to the foam underneath. Also notice that I cut my finger while doing this craft. Whoops. Suffer for the love of the craft.
And here I've added brick brack but have yet to add the face. I really liked the way it looked at this stage in the process.

And finally... here we see the backside of the tree. My craft on display at the Dallas Country Club -- what a proud moment for this crafter!

Thursday, November 20, 2008

Tree Saving Tree Wrap

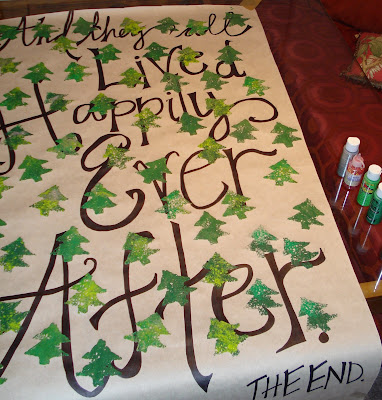
I think I told you last week that I was planning to reuse the scrolls from my office Halloween. You remember, the ones that said, "Once upon a time" and "And they all lived happily ever after. The end." Added together, the scrolls measured 16' long, which will wrap plenty-o-Christmas presents. So I took my kitchen sponge, drew a tree on it, cut out the tree, and stamped little trees all over the scrolls in various greens and silver craft paint. What's great is that I was reusing the paper and I bought the paint when I was a sophomore in high school for a project for Mr. Jensen's English class. It was something artsy that had to do with A Tale Of Two Cities. And here I am a decade later using the same jars of paint for a Christmas project. A little ridiculous. But I'm giving myself a "Conservationist Queen" award for reusing and recycling and being environmentally conscious. Oh and you can't beat a project price of nil. And as long as I'm being super smug. Three cheers for me thinking about Christmas wrap before Christmas is hitting me over the head and is less than a week away. This year I've been getting so far behind in craft projects, I'm proud that I'm done with something Christmasy in November. I've even purchased three presents. Join me in praising myself on so many accounts... Haha. I took a picture of the supplies I needed to do the project. I think its pretty obvious that they are household supplies. Nothing fancy. I loved mixing the green colors across the sponge to produce trippy little striped trees. And they mixed in with the plain jane trees to make quite the forest. I can't wait to wrap presents with it! I love doing projects that require a lot of time, thought, planning, smarts, know how, expensive supplies and all that, but let me just tell you, it is truly liberating to do something as simple as sponge painting. This project required the motor skills of a third grader. Every once in a while, I do a project and think, you know, I could do this again and again. Sponge painting fits that bill. If you are ever in a crafty mood but don't want to have to work very hard to do something satisfying, try something like this. I already have plans for another type of wrapping paper for Christmas. I'm thinking that the next needs to be red and gold to counterbalance this green and silver one. Right?

Wednesday, November 19, 2008

Neverland, the Last Office Halloween Post I Swear

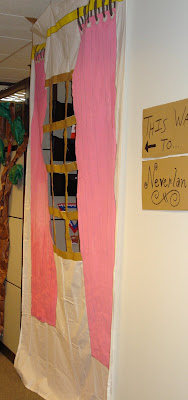
The pictures of this craft don't look so hot. I'm the first to admit this fact. It was too awkward of an angle to get a good shot. Plus, I'm not so hot with the digi cam. My apologies. Here's the idea behind the craft though. So my office area was dressed as the characters of Peter Pan for Halloween. We needed a distinct Neverland theme. And tossing aside any obscure Michael Jackson references, we turned Wikipedia to remember the tale of Peter and his pals. And you know how you get to Neverland? Well, you fly through the window and take the second star to the right and fly on til morning. Please note that's from memory and I'm not sure if that's the exact celestial direction, but that's not important here. What is important is that I took a bed sheet, painted a window, used packing tape to make the frame of the window and scissors to cut the panes out. And we had ourselves a window. And when our visitors came by we covered the floor with white balloons to simulate the clouds with a pirate ship attached to the window. It was pretty cool. The entire department's efforts to transform into a fairy tale land won us $75 worth of breakfast tacos from Taco Cabana. So there's that. For the crafting details, I used craft paint with poster paint. What's great is that I diluted it pretty well with water and it took just a few ounces of paint to cover the entire twin size sheet.

Oh and as far as the pictures go, you get the overall view, which, granted, is cropped pretty funkily. And then you get some shots of me as Peter Pan and my coworkers as Tinkerbell and Captain Hook, respectively. I thought our costumes really sold us. What's great is that Mariya owned that dress already and it is perfectly Tinkerbell colored!

Tuesday, November 18, 2008

Vignette, How's That For Diction?

The Halloween Vignette.
I'll go months without decorating for holidays. The apartment will look exactly the same for months at a time and then suddenly I'll get this urge to really do up something bizarre for a holiday. And the night before Halloween, I just decided that I couldn't live without creating a Halloween vignette on top of my microwave. Of all places. And so I scoured my apartment for creepy things or typical Halloween colored things that could be added to some creepy elements and become part of the vignette. Have you noticed how much I love the word vignette? It's one of my favorite words ever. It's French and I'm a francophile. Plus, like those amazing donut-y pastries from New Orleans, it has that "nay" sound where it looks like "net." Clearly I've moved past the point of the post and I sincerely hope you'll forgive me. I'm a little hopped up on caffeine while I type. Thanks a lot Buzz Brews (By the way, as long as I've mentioned that I'm at a coffee shop while I'm writing this post, I'm going to tell you that the girl who is trying to be all seductive with this guy sitting at the table next to mine just told him that she'd never heard of CCR. Who are these people? How can you live without knowing of Creedence Clearwater Revival? And is that really going to impress anyone? She's all, I'm not into popular music, but not knowing CCR? That's like not knowing who Abraham Lincoln is because you aren't a history buff. She also claims to hate how many Internet cafes have recently sprung up in Cambodia and that when she goes to Cambodia, it's to relax, not to check email. Eavesdropping never loses its appeal). So back to the vignette... Halloween things have to involve candles, right? So I used two little votives, one placed on top of the microwave and approximately 5 inches below the wooden cabinet, which incidentally, is my crafting cabinet, and every intelligent being knows that votive candles don't belong within a few inches of a wooden cabinet. So I lit the candles, turned off the lights and took this picture. Then I had to blow out that little votive. But I think it turned out cutesy eerie. I would never be going for straight-up eerie because that kind of thing just isn't my bag, man. However, I'll take my best stab at cutesyfying any holiday, from Kwanzaa to Arbor Day. And below is a picture of the vignette with the lights on so you can see my efforts in full daylight glory, even if I'm expecting you to appreciate my Halloween efforts though we've nearly reached Thanksgiving.

Friday, November 14, 2008

Fairy Tale, Part One

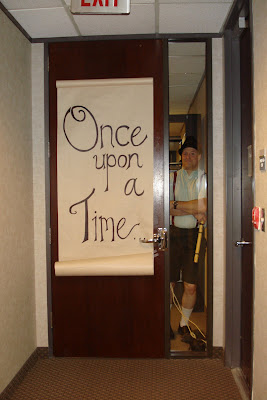
Yep, that's my boss dressed as the Pied Piper, with rats on strings attached to his belt loops. He clutches a South American flute of some variety, which of course is a trademark of the Pied Piper, as you can hardly call yourself a "piper" if you don't come complete with a pipe. And though his costume is daring for the workplace and shows quite a bit of creativity... that's not the point of this post my friends and devoted readers. Instead, I draw you attention to the "scene setting" (yes Katie, those are some useless quotes) scrolls of paper that are hanging on the front door, above, and bottom door, below.


And so begins the crafts for the office Halloween party. And no, you don't need to tell me that my office is a bit like The Office. I already know. I work there after all and I'm pretty high up on the Party Planning Committee. And I stayed up half the night making this and a few other assorted crafts that you are soon to see on this blog for our one-day-long celebration of Halloween. Thank goodness we came in second place (it was a tie for second but who really is counting) for our decorations. We tied with the IT department who turned their computer fixing area into, of all things, a dead cowboy train station, a theme which I believe is a little too out there. They just wanted an excuse to be half ghost half train robbers. And we transformed our lovely 15th floor office into a Fairy Tale Wonderland of sorts, complete with a whole host of delightful fairy tale characters.

I thought that these signs would make a good visual impact on our visitors, setting the tone for the theme. I used one of my favorite types of handwriting--that is my Tim-Burton's-Nightmare-Before-Christmas kind of handwriting so that the font would come off as slightly eery, fairly cheerful, youthful and full of whimsy. Michaels sold a 16' roll of paper, which I used as a table runner down the length of my dining table for a week or two before I had to make the craft and I'll be using again in another creative venture that you'll be reading about in a few days, well, if you want to. Each scroll piece is 8' long and features a few rolls on top and bottom of the writing, to give the storybook look. I sketched out the words in pencil (my least favorite writing utensil) before I wrote the words out with a Marks A Lot marker (or three).

I know that this post has made you anxious to see some more about my office Halloween festivities...

Thursday, November 13, 2008

First Carved From Stone, Then Painted On

So my friends, this is a t-shirt with an Easter Island head painted on it in glittery silver paint. So that doesn't need an explanation, right? Pretty simple?

Well, it goes something like this. My coworker was in quite a tizzy. It seems schools these days won't just let their kiddos dress in costumes for Halloween. (Yes, this is the first of several extremely belated Halloween posts. Sorry about that folks, I got a little teensy weensy bit behind.) Her middle school daughter had to dress in a costume that reflected her geography research project, which happened to be the mystery of the Easter Island heads. And as my coworker had neither the budget (hey, she blew the costume money assembling a kick-booty Hermoine Grainger outfit for Halloween night) nor the time to find a true Easter Island head costume, she decided to go for a different tack -- she decided to play up the fact one silly explanation for the statues is that aliens from outer space came down in their shiny silver UFOs and built the statues and lined them up facing the East. So she made a lovely foil headpiece and got up extra early to paint her daughter's face silver. All she needed was a t-shirt to tie the alien bit to the Easter Island thing.

And that's where I come in. She was lamenting this ridiculous story to me and asked if I had any iron-on transfers so she could print something off the Internet. I volunteered to undertake the project because its just the kind of ridiculousness that makes me love public schools in America. Off to target went my coworker for a cheap t-shirt -- got this one off the clearance rack -- and I brainstormed to make the Easter Island thing as alien-y as possible. Silver paint and some extraterrestrial stars do the trick as far as I'm concerned.

I sketched the guy on paper until he looked just right, put the paper beneath the t, used a sharpie to outline the design on the shirt and then filled in the rest with a home-mixed paint that used silver craft paint with some high-end pigment dust from Azel Art Supply. I used real silver flakes to up the luster and voila!

Little Miss Julia looked awesome, so I'm told, and she was really excited about her shirt. Too bad the silver flakes can't weather the washing machine. It's kind of a one time use only project. It was fun. Let me know next time you need something this ridiculous.

Tuesday, November 11, 2008

Plug #2 Art Show


In many ways, it is quite fitting that my first ever art show should take place at Inwood Village. It's a shopping center that is so tied to my childhood. I had my first job there -- at Smoothie Zone (I can't even remember if that was it's real name!) down where the TCBY used to be, near the old Black Eyed Pea. I made smoothies and served up fro-yo back when I was old enough to work, but not old enough to drive so my mom had to pick me up and drop me off every work day. I had my second job in Inwood Village. I worked at the Zuka Juice that became a Jamba Juice that is now a high-end candle store. So many fond memories of working at the trio of smoothie joints that tried to make a go of things in Inwood Village.

It's amazing that I can get so nostalgic for a simple shopping village, but I love that place. It's anchored by the ever-bizarre Inwood Theater, where, a few weeks ago, my mom and I were walking past the box office as a ticket seller sat in the booth serenading the empty parking lot with his guitar cover songs. I believe he had turned on the box office microphone and was belting out John Denver's classic "Country Roads." It has shops that rival Highland Park Village, Preston Center and Snieder Plaza, yet it is outside the Bubble, and therefore more casual and serves a broader, more diverse community.

In my childhood we took family walks to Inwood Village, accompanied of course by our most beloved dog, Montie. We'd walk to that Starbucks and the cashier would bring out a cup of water for Montie and she'd make a big mess. Now days, there's a permanent doggie water bowl outside the Inwood Village Starbucks, but back then you'd have to tap on the glass, point at your dog and hope that the employees were feeling generous.


The countless hours of time I've spent there eating and shopping, bumping into friends--I really feel like its my home base. I remember my cousin Emily's surprise birthday party at the pizza joint that eventually became Lover's Egg Roll, only to recently become the crepe hot spot, Rise. Emily thought that no one loved her because we'd all done such a great job forgetting her birthday that she ran away from home and missed the first hour or so of her surprise party. And when that pizza place closed, I thought it was the end of the world. And again, when Lover's Egg Roll met its demise (that's the original location, you know), I thought that the place would never be the same. But Rise fits in as well as any place before it. But now I see that it is in those cobblestone paved streets that things are always changing. A smoothie store can become a candle store. And Children's Collection can become Chico's. And Mario Accardi's parents' costume supply store above the floral shop can become Tyler's Dallas. And, finally, the girl who's mom dropped her off to make smoothies $8 an hour can show her art at Starbucks at age 26, 11 years after her first debut in the Inwood Village community.

So, at the top is my invitation to my art show. Which really isn't much of a show because it's just four paintings on the wall between the bakery counter and the bathroom (pretty glamorous, huh?) but it is a start.

And sorry if I get a little too verbose on the subject. I haven't written much lately so I'm feeling a bit wordy.

Tuesday, November 4, 2008

Plug for the Other Blog

Hello my dears --
I'm sure you're all too busy voting today (an activity which takes like forever -- I spent at least 10 minutes in line this morning. Geez! This country thinks I've got 10 minutes to spare every four years, how ridiculous) to check on my poor old blog, but I wanted to give a plug to my other blog, my artsy-fartsy borders-on-the-bizarre PDF'ed. I haven't had time to post lots of my bevy of craft projects to this blog, but with Halloween last week around the office, I kinda went nuts on the other blog. In fact, I have a post scheduled for every day this week and three days of next week. So if you like what you see of my pseudo-artistic endeavors using the copy machine at work, check back frequently.
Other coolkidscrafting items of interest include... Yours truly is busy designing the tree-topper for the Dallas Theta Christmas Tree Auction to be held this weekend at the Dallas Country Club. Never ever in my wildest imagination did I dream that one of my craft projects would end up prominently displayed at DCC, right there on Beverly Drive! It's gotta be really awesome, so naturally with T minus four days to go I haven't drawn up a plan, bought any supplies or started working on it! Yay for being a crafter and procrastinator. Oh and in case you were wondering, some of the Christmas trees to be auctioned off are designed by professionals with every craft and design supply at their fingertips and a limitless budget. Yowza! I just hope my tree topper isn't sad and Homer-Simpson-designs-Lisa's-costumesque when compared to the others.
Thursday, October 16, 2008

Wipey Board Wonders

I'm still having difficulty getting too much crafting done. Or perhaps I should say that I have recently crafted and then forgotten to take pictures of the completed craft... Doh! For my church retreat last weekend, I did a calligraphy project. I scribed the same Bible verse on 36 cards, which were then tied to red roses for our retreatants. They looked simply marvelous darling and naturally I forgot to take a picture of the completed project. Rats! The women really loved the calligraphy project and many of them told me last night that they planned to keep their cards for a long time. Yay! My craft projects have gone to live in other people's lives and that's what really matters. So today I'm showing you some recent drawings from the wipey boards at work, all done by me of course. Above you'll see my Pooh and Piglet. Monday was in fact the birthday of Winnie the Pooh or as they say in Russia "Vinni Puh." If you've got a wee bit of time on your hands, you should watch that link's video. Russian Winnie the Pooh is awesome (thanks to the Russian coworker, I know of his greatness). Normally I don't blog about Soviet cartoons, but just this once... In my drawing, you'll see a particularly trim Pooh (I couldn't quite get the rotundity) with a honey pot and his buddy Piglet giving him a birthday balloon. We like to mark the important anniversaries around this office. Clearly.


And here's my front door. The quote about the hurricane was contributed by one of my coworkers... I'm not that bitter about baseball. I just wanted yall to see what the office mates get to see when approaching my door.

And of course to gloat about defeating the LA Angels of Anaheim or whatever ridiculous string of words and locations they are going by today, I added a dead rally monkey to my door. Enjoy. I promise I'll be crafting soon and then I'll post some cool actual crafts instead of just useless stuff.

Friday, October 3, 2008

Two Months Back

Here's the highlight doodle for the month on August. Pretty exciting, huh? Well, it seems that Hilary has finally mastered the art of the swirl. Oh wait, I've been doing swirly things for years. This is just an ultimate manifestation of all things swirly.
I still wanted to show it off though in case you wanted to see more from me, which, of course, you always do.

p.s. Sorry I'm so delightfully sassy this morning.

Wednesday, October 1, 2008

Three Months Late

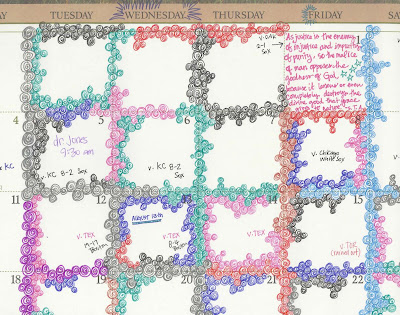
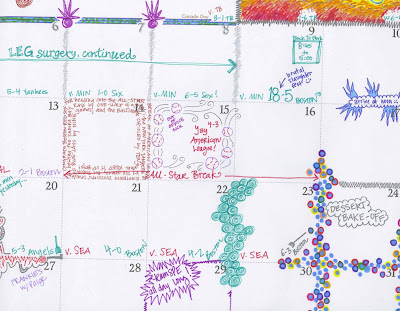
Here are the doodles from the month of July. I haven't posted my monthly doodle sets in a while, so I'll try to do that, now that I've got three months worth stockpiled as pdf's on my computer. I realize that posting my doodles verges on narcissistic, but I just feel like my little inked up calendar is such an expression of me. Anyone who knows me or has ever sat through a meeting with me has certainly seen me have at a piece of paper with relentless, wrapped attention to detail. I won't stop doodling until the whole page is covered, even at the expense of the necessary information on the piece of paper... like phone numbers or deadlines...

I'm particularly proud of this "doodle." I'm also forever indebted to my coworker who handles the office supplies catalog who ordered me the most awesome marker set ever. And I'm proud to say that I've actually managed to incorporate the markers into my work on at least a half dozen occasions. Judging by the doodle, you can tell that I was really looking forward to the leg surgery. I was, for what its worth. I was most anxious to have the surgery in the rear-view window instead of always looming on the horizon. And it was as pleasant as could be expected, considering the crux of the operation was to remove a 17-inch nail from my thigh. Delightful, folks. I decided to follow up my two days of intense health care with a tribute to America.
You'll note that throughout the doodles, you can see the Red Sox scores noted on each game day. A particular highlight of my stay in the hospital (besides the fact that a billion loving people came to bring my flowers and tasty food ... always a huge plus) was that the hospital carried a station that aired the Red Sox. So I got to watch my beloved baseball boys whilst doped up on Aunt Beth's brownies and morphine! Talk about a sweet summer...

Finally, I just really liked the way this turned out. And, no, I didn't win the dessert bake off. I'm not even going to claim that I was robbed (though my cupcakes kicked major booty). It was a high calorie day of office fun.

Monday, September 29, 2008

Church Logo

Can I come out from my hiding place now? I feel like I've been carrying around the weight of this "craft" project for a really long time now. And few of you will even know what this thing could possibly be. Oh well, this gives me a chance to explain!
I was not chosen to be the team artist for my church retreat group. However, when the woman who was chosen had to leave the job half way through, I took over. And thus, you see the results. This is the logo for the upcoming church retreat. The original artist, Kathleen, did the bird and hand part and I added the leaves and branches. And I did a lot of the computer technical parts.
It's not really a craft project I realize. But it is an art project that has been snagging a lot of my time that I usually reserve for crafting. As the retreat date draws closer, I'm sure I'll be showing off some more retreat crafting projects! Get excited!
I did most of the art for this logo on Gimp, which I believe a blogged about a while ago, but is a freeware photo manipulation software that I have downloaded for my laptop. I have nothing but good things to say about Gimp considering that it does all the stuff that I normally do using Photoshop, but is completely free. It's also quite easy to use, though I really ought to get a mouse for my laptop for these kinds of projects. The touch pad thing for your fingers is really tough to use for selecting specific regions. That's a personal problem, not a software one. I did have to shout out for help from my coworker and complete computer graphics guru Eric. He helped with the feathering on the outside of the blue circle.
I'm so glad to be emerging from this project! I get kinda stressed out about digital art projects. I feel like you can always find more ways to enhance the digital files, so the toughest part of a digital project is saying "done!" I am apt to "gild the lily" as it were and keep messing with things until it looks overdone. I hope that this one is simple and dignified yet technically decent. That's all I'm shooting for here folks.

Tuesday, September 23, 2008

Trapped in an Ironic State of Crafting Affairs

Readers -- No pictures, I know.

I am trapped in an ironic state of crafting affairs. Perhaps you could have guessed that from the title of this post. Well, I'll be so kind as to elaborate on this sentiment for you in case it is enigmatic.
When you are of a crafting nature, people think of you when they have a craft project that they need to have done. And being excited about the prospect of helping others, I jump at the chance to take on crafting roles of all varieties. And then the procrastination sets in. And I start to long for the day when my crafting docket is empty and I can paint and doodle and draw and build my silly little designs all on my own whims.
So for now I'm trudging through these ridiculous crafts that I'm doing for others (they truly range from the sublime to the bizarre and one is an absolutely hideous mess on my bedroom floor that I suspect will be FILE 13'ed long after its due date). And well, I'll be honest when I admit that there's at least one project of my own initiative that I'm procrastinating on (bookshelves!).
I'm going to the Natural State this weekend, which does not imply that I'll be going nude, but instead that I'll be going to Nashville, Arkansas to see the Granny and Papaw. My mom and I call this Nashville, "Little N" because when you say you are Nashville bound, people envision you crooning country tunes with a guitar case and greyhound bus ticket to Grand Old Opry Fame. But alas, I'll leave my Hank Williams dreams in check as I go to Little N this weekend, but I'll be sure to pack some crafting supplies!
And hopefully I'll get some work done and have some new gems to share with you all.

Saturday, September 13, 2008

I Knew I Was Saving Those Caps For A Reason

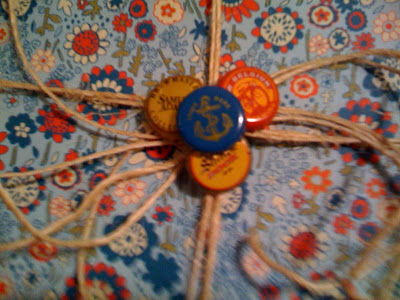
Hey folks, as Paige likes to call me, here's a birthday present I wrapped up and gave to my favorite recently turned 30 pal, Paige. I gave her one of my paintings because she liked it a lot at the time she saw it for the first time and she was fairly excited about receiving the painting. She looked pretty funny walking down Greenville Avenue on a Friday night clutching a piece of painted glass. Oh well. I used this hard-to-define-the-correct-genre wrapping paper that was echoing American farmhouse, sunshine hippie flowy dress, tacky kitchen wallpaper to wrap the piece of glass and I tied it with twine. For those who have ever tried to tie a bow with twine, you know... you are doomed to fail if you are looking to be aesthetically pleasing. So of course this sends me digging around the house for a doo-dad that I can glue into the center of the hot mess to make the whole thing look presentable. And my eyes fell upon my glass jar (thanks Emily!) of bottle caps that I've been collecting (with a lot of help from my dad as I don't really "do" beer) and I saw the perfect solution to two problems:

1. How can I make this present look pretty?
2. What am I ever going to do with these bottle caps?

And I think it looks nice. I got some compliments and that's all I'm ever really going for. You should try it!


Friday, September 12, 2008

Day Off Correspondence


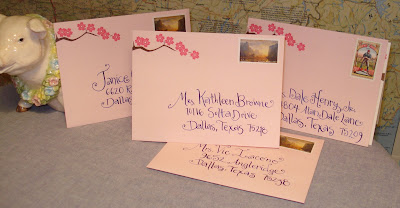
To add to the recent collection of calligraphy posts, here's what I did this morning for some letters I needed to send. I tell you what, I've gotten pretty good at the standard, "Dallas, Texas 752.." because I use it so frequently! And I decided to really roll out the personalized pink stationery that I bought from vistaprint.com (which is cheap yet high quality... I can't say enough good stuff about using them though I'd advise going for the "linen" paper option so that the paper feels really high quality).
Thanks to several practice sessions, I've really gotten comfortable using the colored ink. At first I had a really hard time switching from black to blue or red or gold (the three colors I own besides black) because I felt like you could see differences in color as the amount of ink left in the quill started to dwindle. And that's true -- you can see the color difference, but I've gotten better at knowing when to refill the quill, which is, like, constantly. If I were to write a sentence with my quill with colored ink, it would look like this,
"Geez, d(refill)o you thin(refill)k that t(refill)he So(refill)x have (refill) what it(refill) takes t(refill) to make (refill) it to the (refill) Series (refill) this ye(refill)ar?"
Clearly, it's not an efficient way to write a lengthy amount, but it's all right for addresses... if you are in a patient mood. Luckily for my lady friends to whom the envelopes are addressed, I was in a patient mood this morning.
But now I'm not, I only have so many hours to shop on my day off! Goodness gracious folks, I hope this post will sustain you through the weekend and my trip to NYC.

Thursday, September 11, 2008

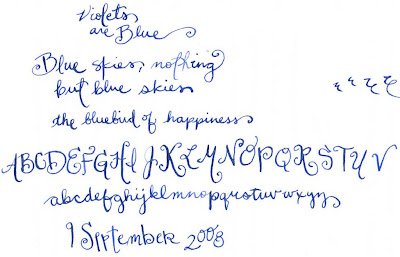
Calligraphy doodling


I had a couple of minutes of free time on Tuesday to do some calligraphy practice. I tell you what, September for a rabid baseball fan can be so busy. Especially when you insist on going a full weekend of games. More on that later if I can get my act together...
I'm trying to get a little better with this new nib I purchased. I need to spend some time working on my form instead of just free styling all the time. I know that Miss Susan likes to see my every calligraphy creation so I hope this keeps my DJ Jazzy happy for a few minutes.
This weekend finds me flying to New York to catch the 7th to last game ever at Yankee Stadium on Monday between the Yanks and the Chicago White Sox (wrong colored Sox for this fan's taste, but you can't get everything you want). It's overwhelming enough to know I'll be attending the wake of the cathedral of baseball, especially in a down year for the Bronx Bombers. But alas, I've wandered away from the strict confines of my craft blog to boast about my good baseball fortune. The reason I bring this up is that it seems that I won't be getting a chance to do too much crafting over the weekend. I'll see if I can get something done...
Toodles!

Friday, September 5, 2008

Giving You The Bird

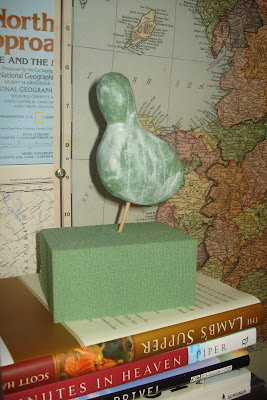
What in the world is this? You should be thinking that thought when you look at the above picture.

Well, it is a bird that I carved out of garden foam--you know that stuff that you soak in water and then stuff into flower pots to make an arrangement? I don't know what it is officially called, but I do know that it is super easy to use for carved projects. Of course, it's easy pliability can be a problem, too. As soon as you are done carving your little object, you'll need to coat the the sculpture with a bunch of layers of sealant. I used modge-podge but I think you could use rubber cement if you wanted to.

The picture above is the little birdy all carved and covered in a coat of glue. He's being held up by a toothpick stuck into another brick of plant foam.

Tune in for updates on this project! Pretty soon he should look a lot more like a precious birdy! He'll even be perched on a log!

Wednesday, September 3, 2008

Nerd Alert: I've started collecting stamps

If you are lucky enough to have received personal correspondence from me in the last few months, then there's nothing new about this post. But alas, I don't think that my regular readers correspond with those folks I've written to recently, so I'm showing off my new style.
I can't even remember when I read about doing this (or where, but I'm thinking it was in Domino a year ago or so), but as soon as I saw this concept for the first time, I decided I had to become one of these kinds of people--the kind of correspondent who artfully arranges a collection of stamps to letters instead of just slapping one Liberty sticker on the envelope.
And you know what? Stamp collecting is actually a little fun. I haven't crossed a total geek line -- all of my stamps are those that can be purchased online from the US Postal Service. I am not out there on eBay scoping for some long lost collector's edition something or other.
I love that two of my stamps show pitchers--a lovely silver one and a porcelain one, too. It's all so delightfully domestic, well, all except for the mountain goat, but he's a cute little character so I don't mind.
I'm a little nervous that my postman is going to freak out on me at some point though I'm quite sure that all these post office tasks are handled by robots nowadays anyway.
Another reason why you should consider doing this besides the obvious--quick addition keeps the brain alive and active--it's pretty cheap. A whole stack of two-cent stamps costs less than a dollar. If you are interested in doing this, address your envelopes AFTER you've put the stamps on. Otherwise, the envelope may look crowded and less like a miniature work of design art. As long as the point of writing a letter to someone is to be exceptionally thoughtful (hey, if you wanted to be a slacker, you could just email or call in your thank yous), the envelope might as well be an outward sign of your courtesy, right?

Monday, September 1, 2008

Mean Green Clothes Dryin' Machine

Notice anything green about my bathroom? (Besides the plethora of green clothing...)
This weekend I successfully installed my drying rack in my bathroom. And when the shower curtain is closed, you don't even see the plastic monstrosity. Of course, in the eyes of an environmental protector (or whatever green people want to be called), the drying rack is a thing of beauty. For me, it means I can run four loads of clothes through the washing machine but only two in the dryer, saving energy and having softer, less shrunken clothing.
I recognize that this isn't a particularly crafty project, but as my little mission statement says (see the Left Panel), I like doing things that are cheap and using the dryer less is cheap!
Plus installing the thing was nightmare-ish. My ladder didn't fit in the space so I had to stand on the (very) narrow wall-side ledge of my bathtub to install one half of the thing. And all whilst using a power drill at an awkward angle. All in all it's worth it though and I get a kick out of being a little friendlier to the Earth.
And really, it isn't that ugly. I enjoyed artistically arranging my clothes on the hooks beneath the mirror and on the drying rack. Note that no, as Martha would say, "unmentionables" are visible! Goodness gracious, even a green girl has to have some standards!
And now for a completely useless aside... when I was a study-abroad student across the Atlantic in Florence, Italy. I lived with the lovely Bianchi family and enjoyed many, many moments of it. Of course, I declared war on the clothes line that was precariously placed outside my fourth story window. I had to dry everything outside! And I had the absolute worst eye for Tuscan weather. I'd often go to classes with my "unmentionables" and other assorted clothing items blissfully blowing under the Italian sun only to remember as I rode the crowded bus home from school through a blustery downpour that all my poor clothes were getting pounded! And naturally a sock or two wouldn't be able to stand the storm (this compounded with my weak clothespin skills) and would plummet to the ground and gated garden below. I'd have to knock on these poor old people's door and try to explain in very sad and broken Italian "sock" "ground" "over there."
Oh Italian laundry. How difficult it all seemed then. How quaint it seems now. I'm delighted to recreate the situation right in my very own bathroom!
"Posso fare un bucato?" -- That's Italian for "Could I do a load of laundry?"